
How to make velvet cake at home. Red velvet cake at home - original recipe
Red Velvet cake has long become a popular dessert not only in various cafes and restaurants, but also at home. It came to us from America, where it is considered a classic and is called Red velvet cake. During its life, the cake has undergone enormous changes. But the delicate texture of the biscuits remained unchanged.
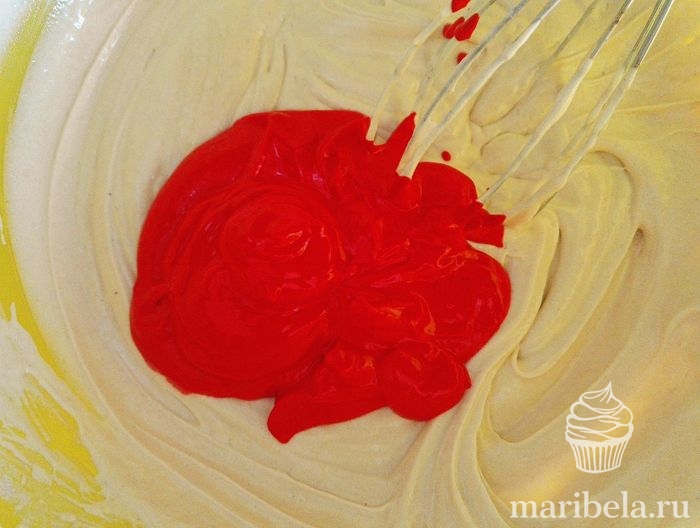
If you try the dessert for the first time, you will be surprised by its chocolate taste. Where? The red color of the cakes does not foretell such surprises. When preparing a sponge cake, be sure to use gel coloring. It makes the color brighter and richer, and cocoa adds depth to the red color.
Cream for cakes is most often made from cheese and cream. But the taste of the biscuit goes well with cream cheese and cream with mascarpone. You can try different options and find the right taste for yourself.
Red Velvet is my second assignment in the pastry course. The first lesson was. I prepared and photographed all the processes for the teachers so that they could track at what stage I made a mistake (well, if this happened), and they could give me detailed advice on where I made a mistake and how to correct it.
This time I decided to use cream based cream. I wanted a snow-white color and a soft, creamy taste. And combined with the chocolate taste of the biscuit, it’s a flavor bomb.
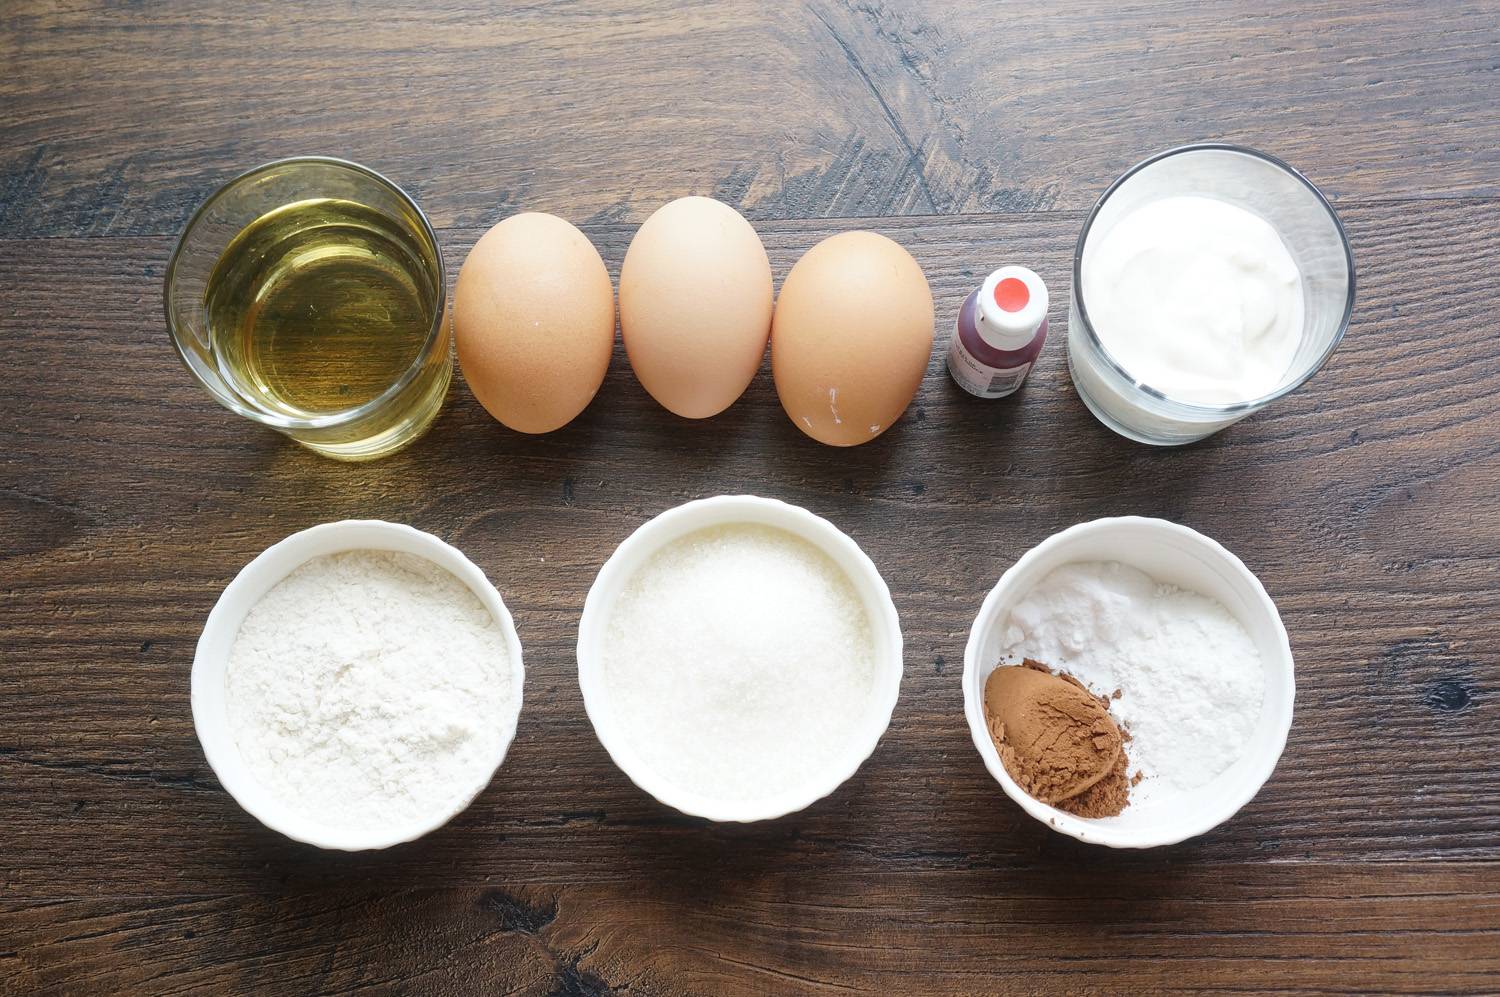
- Granulated sugar – 300 g
- Flour – 340 g
- Cocoa – 1 tbsp.
- Salt – ¼ tsp.
- Baking powder – 2 tsp.
- Soda – 1 tsp.
- Eggs CO – 3 pcs. (180 g)
- Vegetable deodorized oil – 250 g
- Kefir – 280 g
- Helium dye – 2 tsp.
We take all products at room temperature. The cooking process is very simple.

- Pour some kefir into a separate container. Approximately 50 g. Add soda and baking powder to it and let it sit for a while for a reaction to occur. The mass will increase and become covered with bubbles.

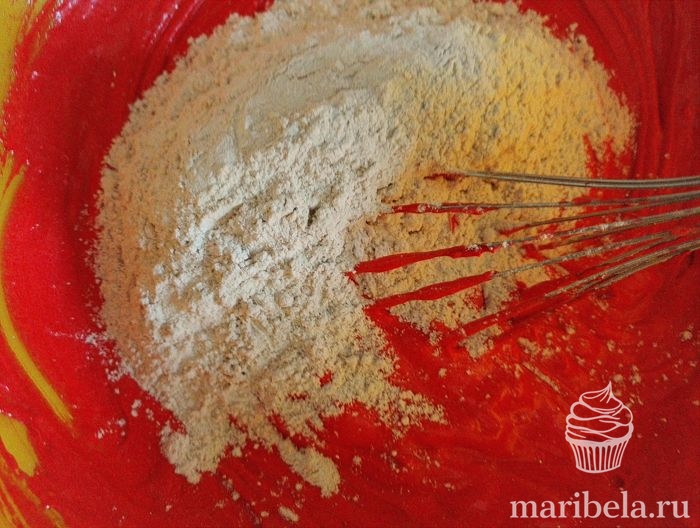
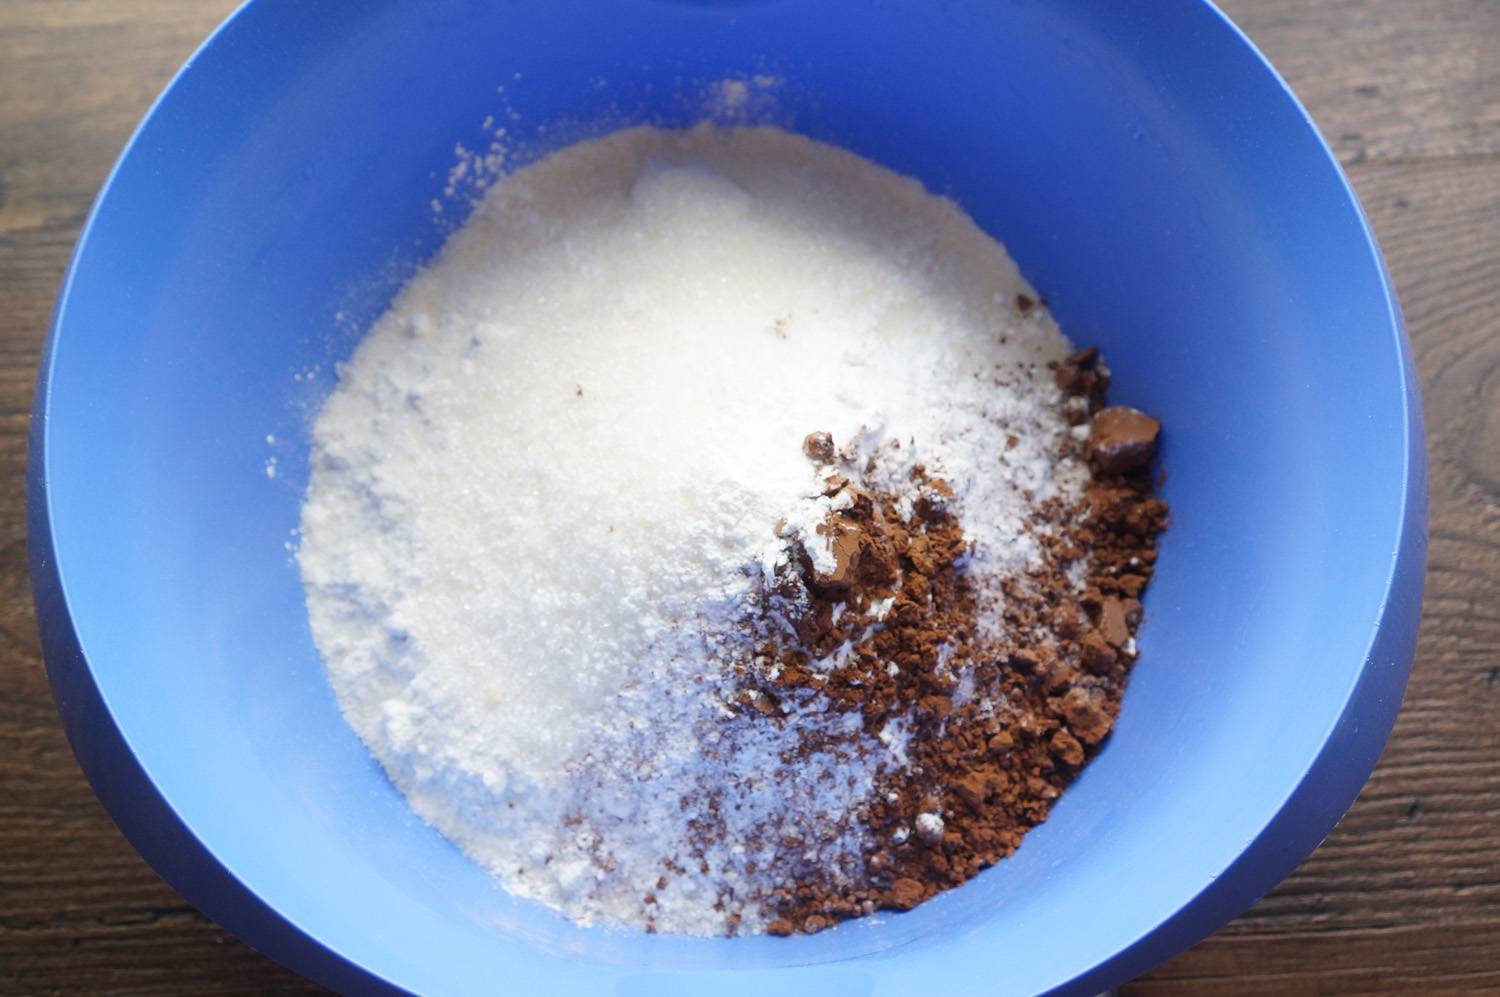
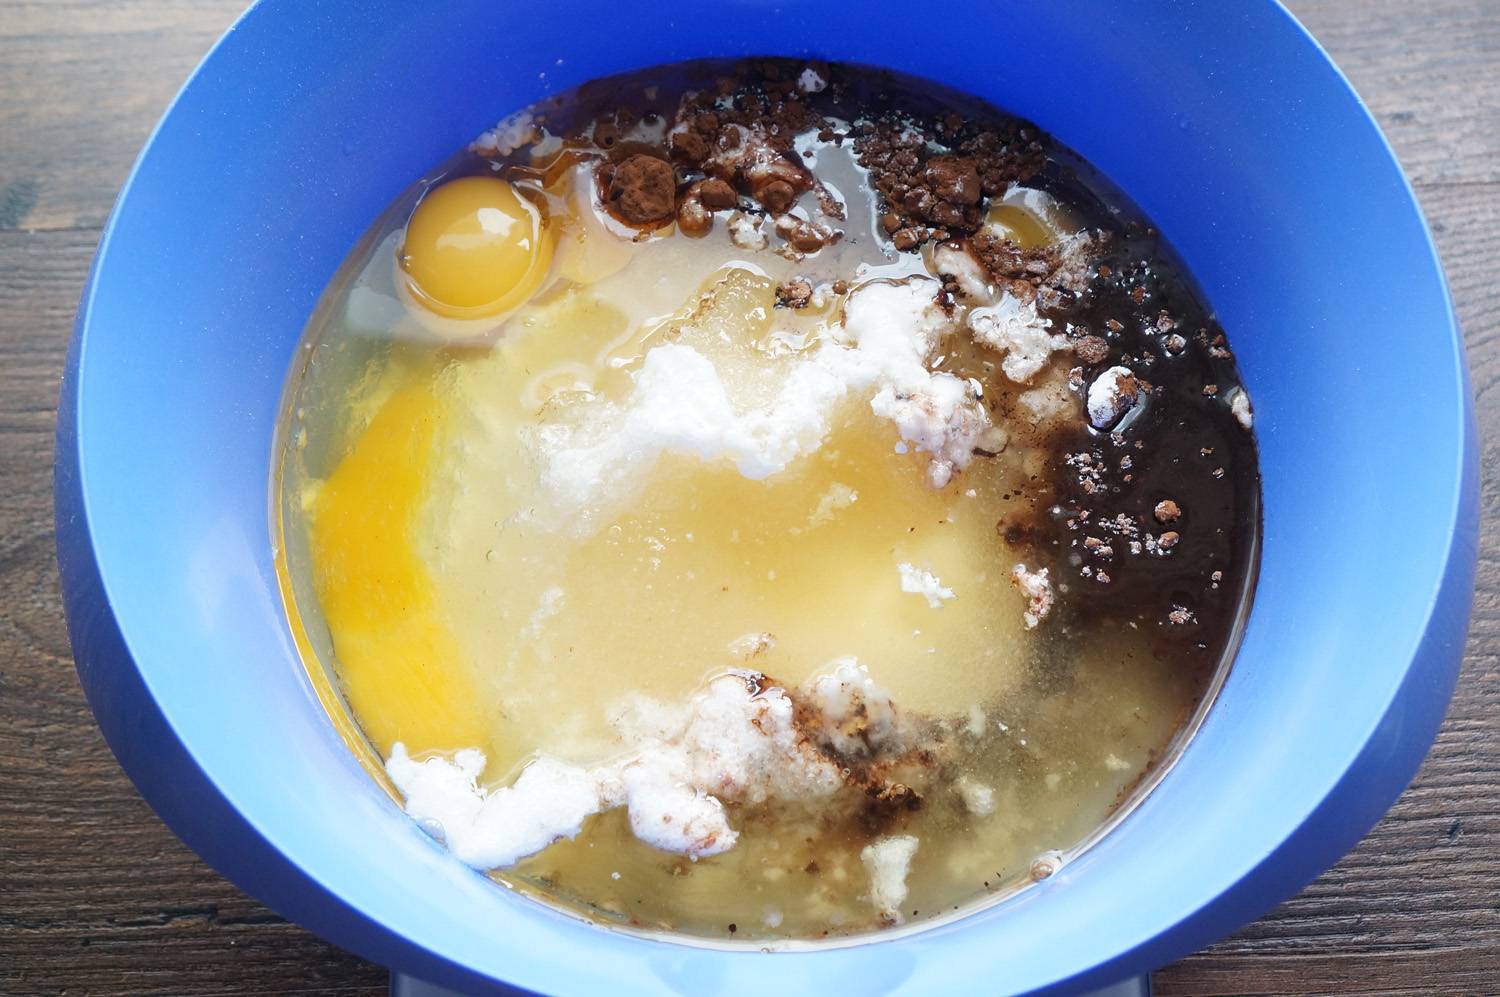
- Combine all ingredients in one bowl. Pour in the swollen kefir and mix with a mixer at low speed. In subsequent stages we increase it

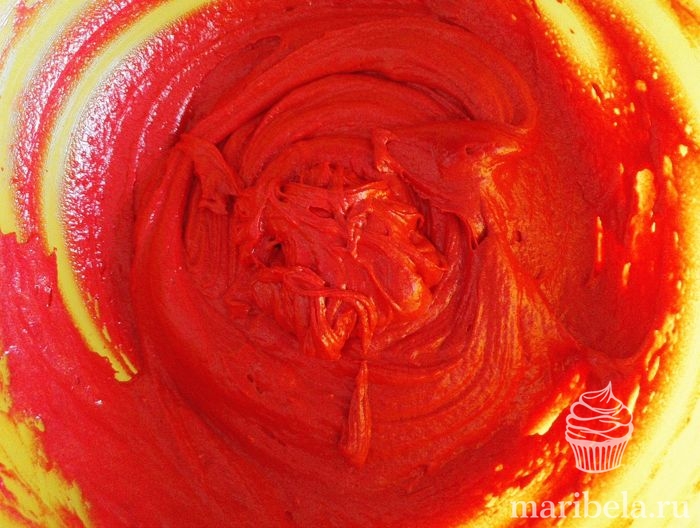
- Add the dye last. The color of the dough should be bright red, therefore, if necessary, increase the amount of dye and cocoa. Please keep in mind that the cakes will darken after baking.
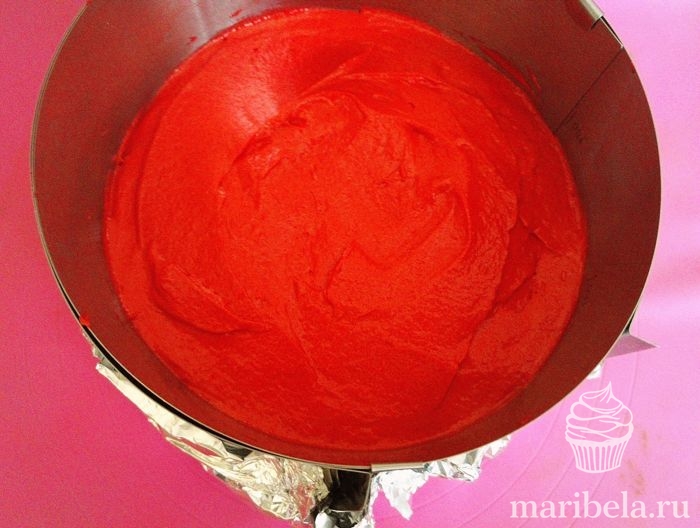
- The dough turns out liquid. This is fine. We bake in two approaches. If you have two forms, then you can do it in one go, since they both fit on the baking sheet. I do not recommend baking in one form at a time. There is a lot of dough, and it contains vegetable oil, and baked goods with it can burn on top, but not bake inside

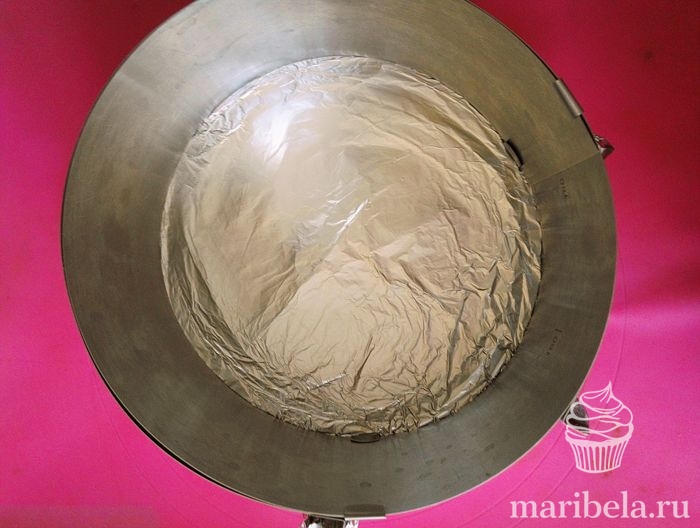
- I have a ring with a diameter of 18 cm. I wrap the bottom with foil in two layers. I press the edges tightly and pour out half of the dough. I'll let you stand. Due to its fluidity, it will spread exactly in shape on its own.
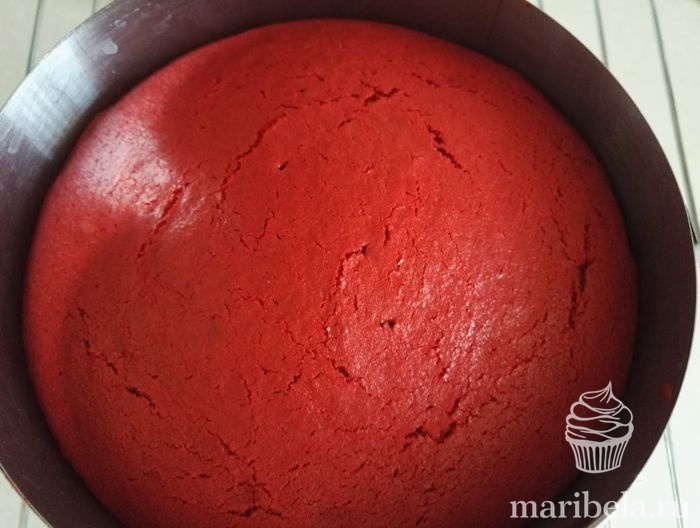
- I put it in the oven at 180 C for 30-40 minutes. I check for a dry skewer. The top rises a little during baking and may even crack. We will then cut it off and use it for decoration. Do you see in the photo how much the color of the baked biscuit has changed?

- Remove from the oven and let cool slightly in the pan. Then, pressing tightly to the edges with a knife, we draw it along the mold, separating the cake from the walls. Turn the cake over onto a wire rack, bottom up, and cool.
- We do the same with the second cake.
- Once the cakes had cooled, I wrapped them in cling film and placed them in the refrigerator overnight.
- The next day I prepare the cream, coat and decorate the cake.
For cream:
- Cream cheese – 1000 g
- Cream 33-35% - 200 g
- Powder – 80 g
Cream and cheese should be cold.

- Measure out the required amount of products and whip the cream and cheese at medium speed, gradually increasing the speed
- After the cheese and cream are well combined, stir in the powder using a silicone spatula.
Assembling the cake
- There are options here. You can cut it out of ready-made cakes into a smaller shape. Or cut it with a knife and place a smaller diameter plate on the top of the cake. In this case, the side parts do not need to be coated with cream. If you go this route, then reduce the amount of ingredients in the composition by half.
- Divide the cakes in half
- We plant cream stars around the perimeter using a star attachment, and fill the middle with cream in a circle. And so go through all the cakes. Decorate the top with stars all over the surface, sprinkle with balls and get a minimalist design

- I wanted to do it differently. I cut off the tops of the cakes and divided each cake in half with a saw knife.

- I chopped the cut tops and put them on a baking sheet in the oven for one hour, temperature 100 degrees. I stirred the scraps several times to ensure they were heated evenly.
- I crushed them in a blender into small crumbs. It turned out buttery due to the vegetable oil contained in the dough

Collected on a substrate. I attached the bottom cake layer to the cream, the cream on top, and so on for all the cake layers. I put it in the refrigerator for a couple of hours to set. Then I leveled the sides and top, and again into the refrigerator. After finishing, I sprinkled red crumbs over the entire cake, brushing off the excess with a silicone brush. I placed stars on top and decorated the side edge.
Delicious recipe for Red Velvet with mascarpone
This recipe uses mascarpone cheese and cream cheese to layer the cake. The combination is delicate, soft and light.
For the biscuit:
- Butter - 115 g
- Sugar - 300 g
- Eggs - 2 pcs.
- Sour cream or kefir - 120 g
- Cream (33%) – 120 g
- Red gel food coloring - 1 tsp.
- Flour - 250 g
- Soda - ½ tsp.
- Baking powder - 1 tsp.
- Cocoa – 15 g
For cooking we use products at room temperature. Remove eggs, sour cream and cream from the refrigerator in advance

- Melt the butter over low heat (but do not boil), cool slightly and mix with granulated sugar

- Beat in the eggs one at a time, stirring each time with a mixer whisk.

- In one bowl mix dry ingredients: flour, baking powder, cocoa, soda

- The original recipe uses buttermilk, but if it is not available, then replace it with kefir or sour cream and mix in another container with cream and coloring
- Sift half of the dry mixture into the sugar-egg mixture and combine the mass at low speeds
- Pour in the creamy sour cream filling with dye and knead again
- Sift the remaining dry mixture into a bowl and mix thoroughly

- Grease the mold with butter and sprinkle with flour. Pour half of the dough into the mold, and put the second part in a cool place.
- Bake in a preheated oven at 180 C for 15-20 minutes
- Let cool slightly in the pan, cover with a sheet of parchment and a wire rack and carefully turn over. Let the biscuits cool
Cream:
- Mascarpone cheese – 240 g
- Cream cheese – 240 g
- Cream (33-35%) – 360 g
- Powdered sugar – 120 g
Products for cream should be cold.

- Combine Mascarpone cheese and cream cheese (Hochland, Violette or Almette) and powder in a bowl and beat at low speed

- Add the cream in a thin stream and beat until thickened.

- Place the first cake on a plate and cover with a good layer of cream

- Place the second cake layer on top and press it down a little with your hands.

- Remove excess cream from the sides

- Cover with the remaining cream and level the sides and surface.

- Decorate with berries and sprinkle with powdered sugar through a sieve.
Original Red velvet cake recipe from Andy Chef
I tried a lot of recipes on Andrey's blog, and most of them took root in my family. But they never got around to Red Velvet. I am correcting this omission - the cake deserves it.
Ingredients for the crust:
- Butter 82.5% - 220 g
- Sugar – 395 g
- Eggs – 2 pcs.
- Milk – 250 g
- Flour – 360 g
- Baking powder – 10 g
- Cocoa – 15 g
- Red helium dye
The proportions in the cake are calculated very accurately. The only thing for myself (through testing) in the author’s recipes is that I reduce the amount of sugar by 40%. Otherwise, for me it turns out cloyingly sweet, and I don’t like it that way.

- We take the butter out of the refrigerator in advance and use it the moment it softens. Mix it with sugar using a mixer
- In a separate bowl, mix the dry ingredients: flour, cocoa and baking powder. The mixture must be homogeneous, otherwise it will affect the composition of the finished dough.
- Beat the eggs into the well-mixed sugar-butter mixture, one at a time.
- We take milk with a fat content of approximately 3.5% or replace it with kefir or fermented baked milk with the same fat content. Pour half the liquid into the mixer bowl and mix with half the dry ingredients
- And again milk and dry mixture and mix thoroughly. The dough turns out elastic
- Add dye. 7-8 g is enough. The color should be brighter than we want to get, because when baking it fades and changes its shade to a calmer one.
- Finally, mix the dough mixture with a spatula.
- For baking, take rings or a mold with a diameter of 16 or 18 cm. If 16, then pour into three forms or bake in three batches. Place the dough that is waiting its turn in the refrigerator.
- The oven is heated to 150 degrees. Check readiness with a dry skewer or by pressing on the cake. If it springs, then it’s time to pull it out
- Cool a little (5-7 minutes) and release from the mold, wrap hot in cling film and place in the refrigerator to collect moisture.
- Cut off the tops, releasing the velvety center of the cakes. The trimmings will still be useful to us. With their help we will apply the so-called velor layer on the cake
- I will skip the assembly stage; it is no different from those described above. Take any cream that holds its shape - Cheese cream, cream or mascarpone.
- Chop the remaining biscuit into pieces and place on a baking sheet, dry at 100 degrees for about 50-80 minutes. Turn the pieces occasionally to ensure they cook evenly.
- Blend the baked pieces in a blender until they form fine crumbs.
- Apply biscuit crumbs to the cake ready for decoration using a silicone brush and sweep away the excess. The surface is velvet-velor. The cake looks elegant and expensive.
How to decorate a cake for a birthday or wedding
Sometimes the question arises - how to festively decorate a cake for a special event? After all, you want to get not only a tasty result, but also get aesthetic pleasure while looking at your masterpiece.
I loaded myself with this question and went to ask Yandex for beautiful pictures of decorated cakes for a birthday or wedding. Take a look and choose what you like. After all, looking at ready-made options, it’s easier to think through and implement your own.


Video recipe: how to bake Red Velvet at home
If you prefer to see once than hear a hundred times, then watch the video master class on making the legendary Red Velvet cake.
Hi all. Today I will share with you the recipe for Red Velvet Cake. Yes, I already have one recipe for this legendary cake on the blog, but this time it will not be made with vegetable oil, but with yogurt. And this, so to speak, is its light version.
I found this recipe a long time ago on @shanti_aa’s Instagram page; it captivated me with its composition. It doesn’t contain “a liter of butter and a kilogram of sugar”) So I prepared it immediately. And now, I’ll tell you frankly, I make this cake exclusively according to this recipe.
The biscuit turns out so tender and fluffy, it’s like a weightless cloud.
I will first describe the entire cooking process, and then all the nuances of working with such cakes.
So, how to make red velvet cake with adding yogurt at home with photos step by step.
Ingredients for a mold diameter of 18 cm:
- 95 grams butter at room temperature
- 180 grams of powdered sugar
- 2 small eggs (C2)
- 190 grams flour
- 4 g strong cocoa (alkalized)
- 1 half teaspoon of soda
- 0.5 tsp baking powder
- 0.25 tsp salt
- 170 ml. natural yogurt
- 0.5 tsp dry dye (or 1 tsp gel)
Preparation:
Place butter at room temperature (you can use 72% for the dough) in a mixer bowl and beat together with the powder at high speed until white. In my mixer this takes about 5-7 minutes.
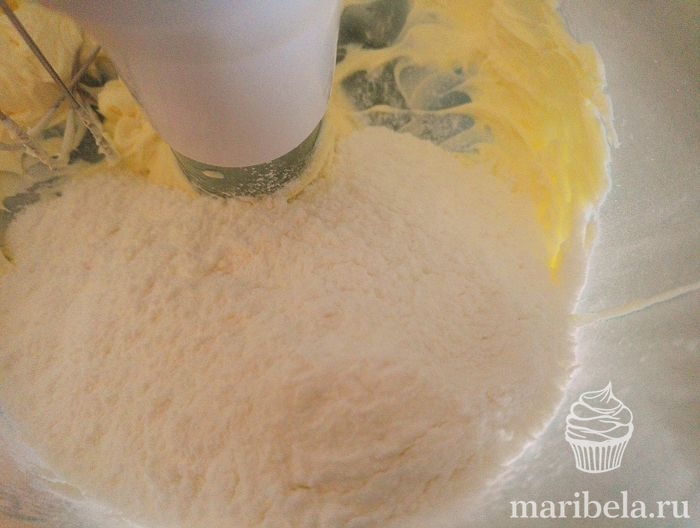

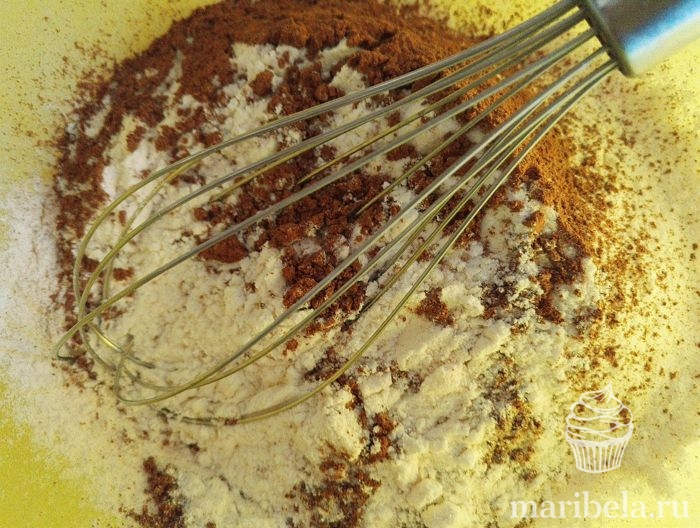
While the butter is whipping, you need to sift all the dry ingredients: flour, cocoa, soda, baking powder, salt. And mix them thoroughly with a whisk.
Dissolve the dye in yogurt and leave it for a while.
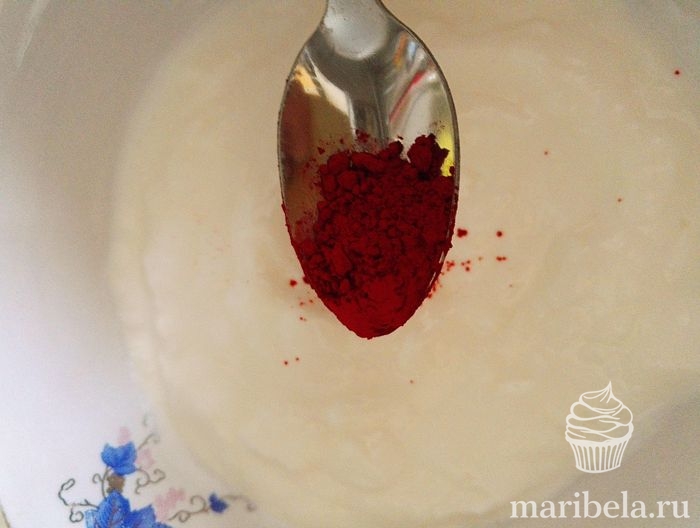
Yogurt should be natural, without dyes, at room temperature. I prepared this sponge cake with Greek yogurt, Sloboda, Danone and Activia yogurt. The main thing is that it should not be drinking yogurt. Typically their fat content is about 6%. You can also use homemade yogurt if that's what you do.
Let me make a reservation right away: you won’t be able to color the biscuit with beet juice. If you don't have food coloring in the house, then, unfortunately, you can't make red velvet. But, you can find a replacement for it (there are many good recipes on my blog) or simply cook it without dye. I have India dye, I bought it by weight at a confectionery store. It is quite possible to paint with gel dyes; I use Americolor and Top Product.
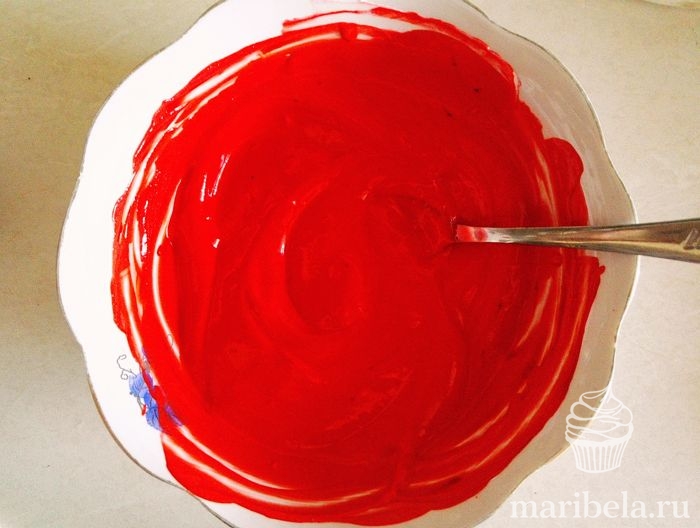

Then add half the yogurt there and mix again.
Then again a third of the bulk.

Then the remaining yogurt.

Then loose. Mix everything well every time.
This is the consistency of the dough.
I bake in a split ring and don’t grease the sides with anything. I just wrap the bottom in foil.
Attention, the cake rises very well. It measures 6-7 centimeters in height, so don’t fill out the form more. than half.
Place in a preheated oven at 160º degrees and bake for about an hour. I bake for about 50 minutes. So look at the dry splinter. I always go by smell; as soon as it smells good, I go check everything.
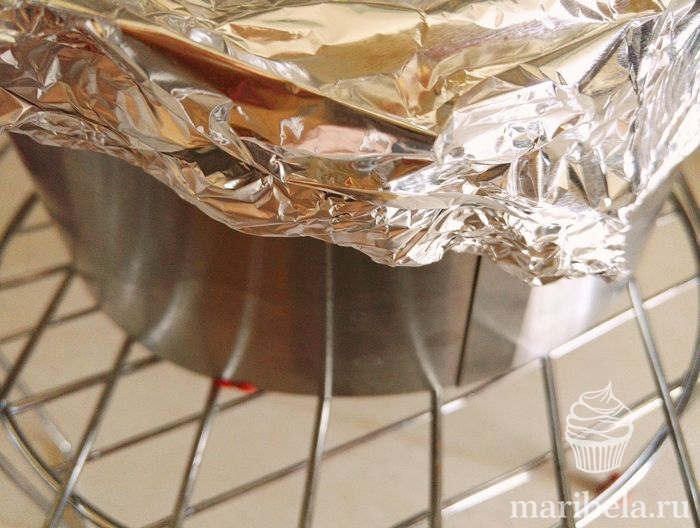
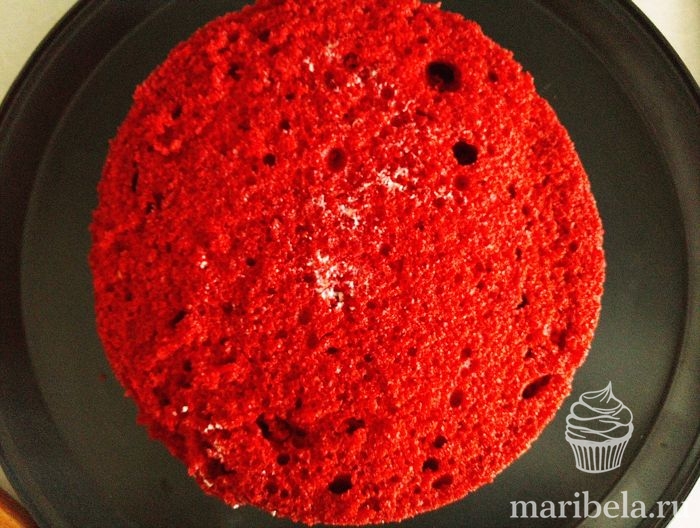
Next, you need to properly cool this biscuit. It must be turned directly into the mold onto a wire rack or onto a support in the form of cans, so it must cool completely. The biscuit is very tender, this is done so that it does not settle when cooling.
Then, use a knife to pass along the edges of the mold and remove the cake. Do you see how tall and wet he is?!

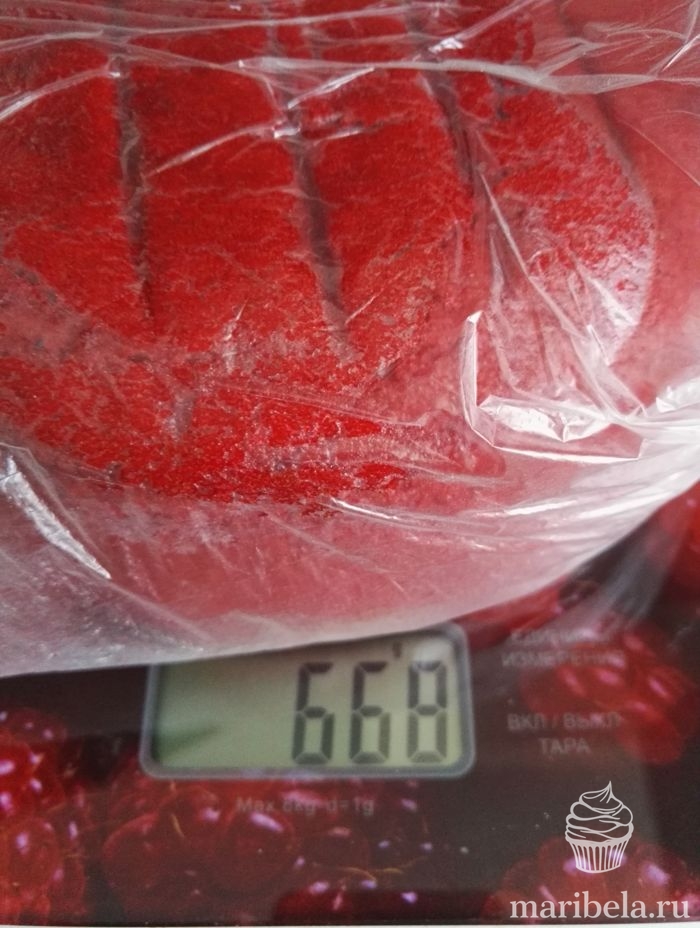
Wrap it in film and put it in the refrigerator overnight to redistribute moisture. The total weight is 670 grams.
In the morning, cut the sponge cake into 3 layers, be extremely careful here, because the sponge cake is very delicate, it can break if handled roughly.

What other nuances are there when working with it?
Well, firstly, it does not contain vegetable oil, therefore the biscuit requires impregnation, but not much! Here you need to know when to stop, because due to its airiness, the sponge cake absorbs moisture and, by over-soaking it, your cake can “float”, as happened to me once.
Secondly, the cake is delicate; the edge always breaks off a little when cutting, so we cut it carefully.
Thirdly, it crumbles. Therefore, be sure to make a rough layer so that later there are no crumbs on the outside.
Now I’ll show you how I assembled this cake.

We make a border of finishing cream around the edge. You need a thick cream that holds its shape well and is convenient for you to work with in terms of leveling.
It can be (as in my case), or (all recipes are available via links, just click on the desired name and you will be taken to the page).
Why is it necessary to make sides from thick cream? To ensure that the filling does not leak outside the cake) Make this a rule, otherwise the cake may “float” or move out.
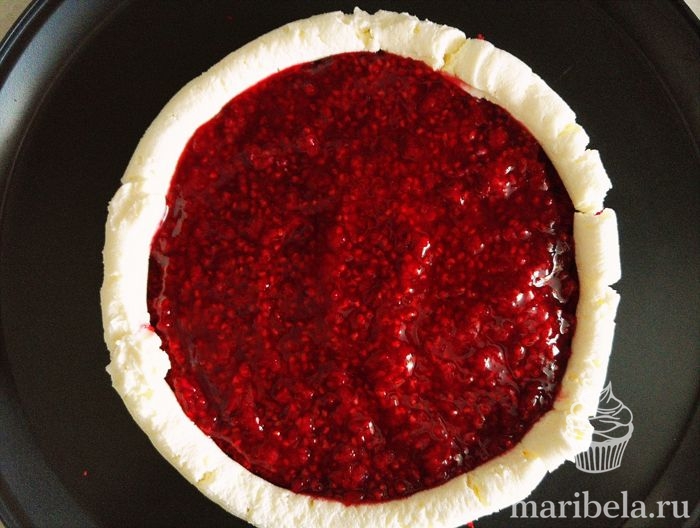
Then, I put the filling into this “well”. I specifically decided to put the filling on the biscuit so that it would give its juices there, since I almost didn’t soak it.
I chose raspberry confiture as the filling. To do this, I took 200 grams of fresh raspberries, 10 grams of water and put them in a saucepan over medium heat and boiled them for a minute or two. Then I added 100 grams of sugar (adjust to your taste) and 8 grams of corn starch. Boil for another three minutes until thickened. Removed from heat and cooled to room temperature. If you want the filling without seeds, then you need to pass the mixture through a sieve. Then the amount of raspberries should be increased.

Place cream on top. Level the surface.
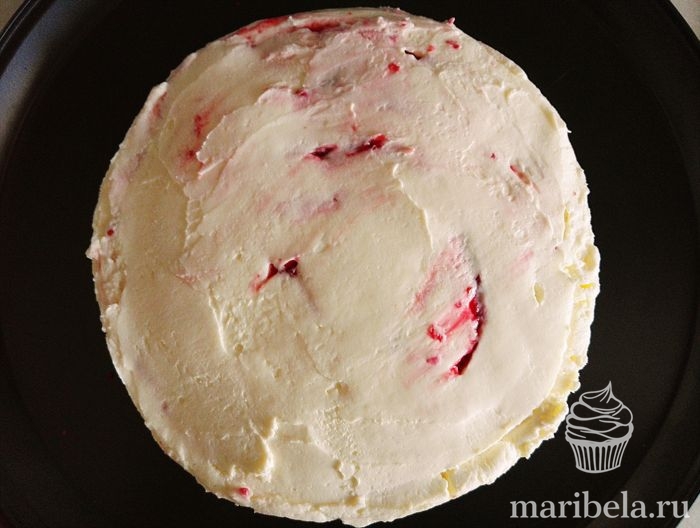
And lay the next cake. So until the end.
Then, immediately apply a rough coating, wrap the cake in film and put on top the ring or mold in which you baked the cake. This is necessary so that the cake takes the correct shape. You can collect it right away in the ring, it doesn’t matter, do what’s most convenient for you.

Place the cake in the refrigerator to stabilize. I usually leave it overnight. However, I always recommend waiting a couple of hours before finishing the coating, because otherwise the cake may skewer or cracks may appear in the cream.

In the morning, remove the ring and level the cake for finishing. Here I used . For a given diameter, you will need 400-500 grams of ready-made coating cream to cover the cake.
For the filling, I would recommend lighter cream-based creams, this or. These are absolutely ideal options. For the layer you need 600 grams of cream. I didn’t have cream on hand, so layering the same with it is also tasty, but more fatty. Thus, we will need about 1 kg of cream for the whole cake.
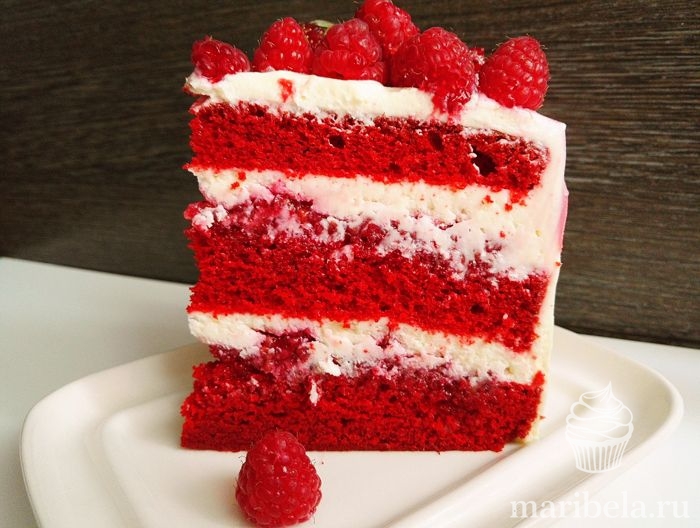
This is the kind of cake I made. I made the strokes on top with the same cream, coloring it with red and turquoise gel dyes.

And this is a cut. Wet cakes are indecently red, snow-white cream and berry filling. This cake will not leave anyone indifferent.
If you're looking for a substitute for the "fat" version of vegetable oil-based Red Velvet, then this is the perfect recipe for you.
Be sure to try this cake. I'm sure you'll like it.
Bon appetit.
Red velvet cake is mega popular right now. I've already lost count of how many times I've done it.
The dough is very easy to make, especially if you have a stand mixer in your kitchen. Place everything in a bowl and beat until smooth.
I bake three cakes with a diameter of 24 cm. You can bake in one form, and then cut. But by baking each one separately, we get an even cake without cracks (I like this option better).
I always make red velvet cake with cream cheese frosting. You can eat it right away, but if you let the cake sit, it will be a flavor bomb!
As for decoration. It all depends on your occasion and imagination. I decorated the cake with chocolate and fruit. In general, you can disguise this beautiful cake under any decoration.
Our ingredients for the dough.
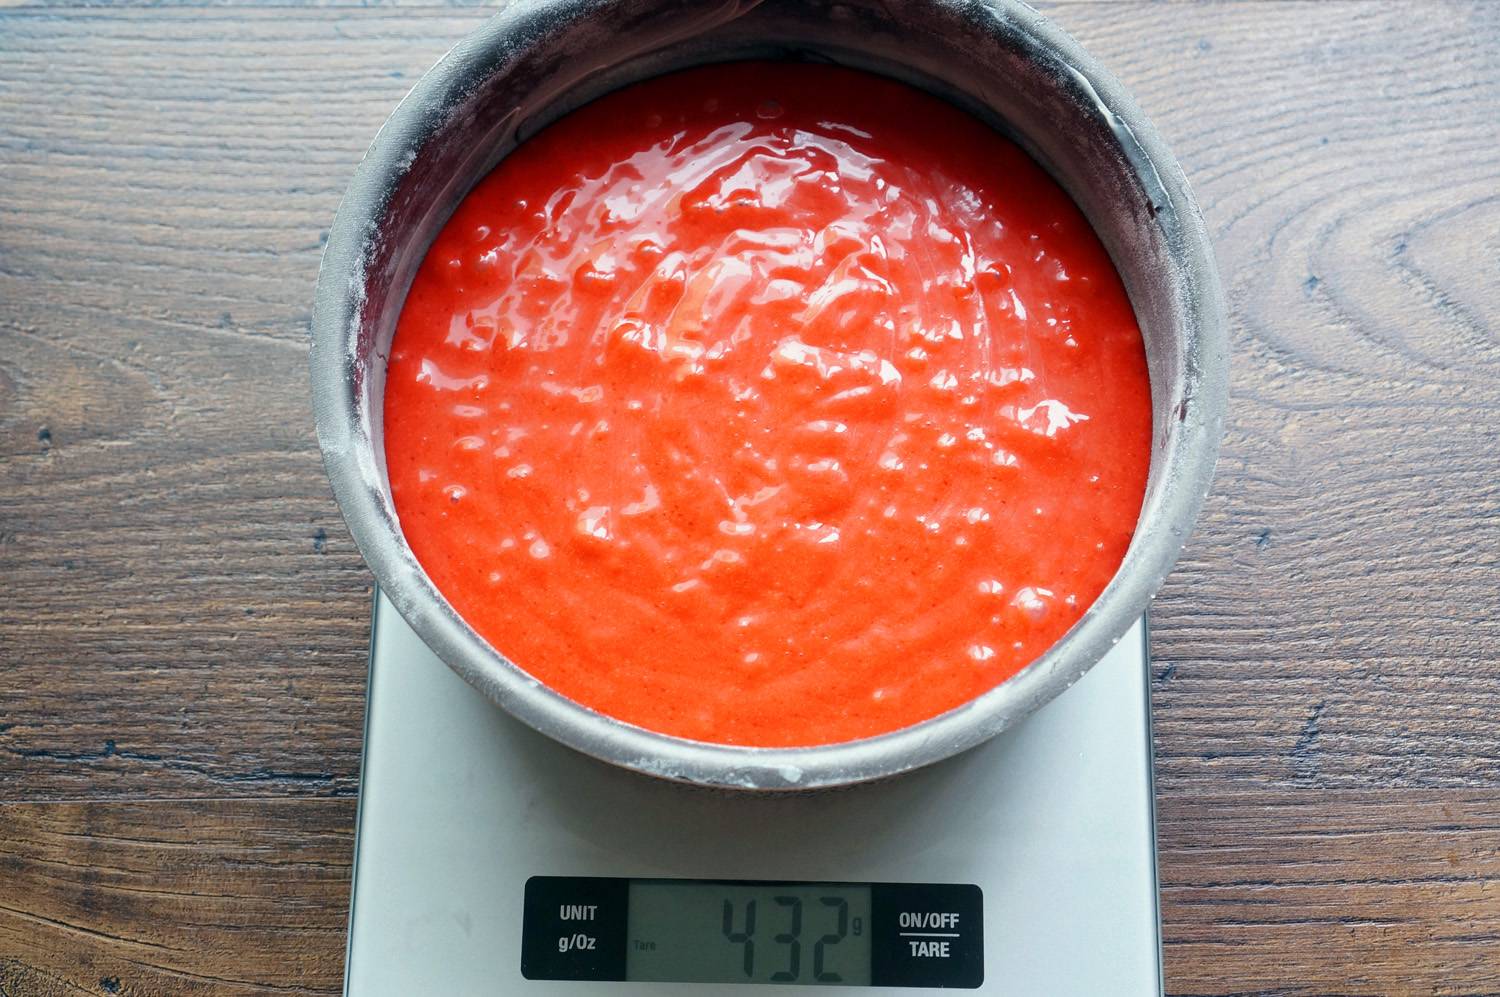
We put the bowl on the scales. First, add all the dry ingredients.

Then add the liquid ingredients.

Beat the dough with a mixer until smooth and homogeneous.

We cover the form with baking paper. Pour out the dough.
If you bake three cakes, you get 450 g of dough for each.

Bake the cakes at 170 degrees until done. Approximately 12-15 minutes.
Run a spatula around the edge of the pan and remove the cake, remove the paper and cool the cake on a wire rack.
The cakes are very delicate, you need to work with them carefully.

Ideally, wrap the cakes in film (each separately) and leave for at least a couple of hours.
I bake the cakes in the evening and assemble the cake in the morning.

To make it really beautiful, I trim the edges. You don't have to do this.

The cream for the cream must be cold.

Whip the cream to stable peaks.
Add cheese and powdered sugar.
Beat again until smooth.

It is more convenient to assemble the cake in a split ring. If this is not the case, you can do it in the usual way.
Spread a third of the cream onto the crust and smooth it out.

Cover with the second cake layer and spread the cream again.

Close with the third cake layer. We remove the ring.

Apply cream to the sides and top of the cake.

Smooth out the cream and decorate.

Today I made a red velvet cake with cream cheese cream like this. Try it, you won't regret it!

You can leave the sides open, it also looks great.


Red Velvet cake is becoming an increasingly common holiday dessert in the modern world. It consists of sponge cakes with shades of red or burgundy, soaked in delicious cream. The cream can be prepared in different ways.
Various aromatic additives are added to the dough and cream: cocoa powder, vanilla, food coloring. Usually the cake is made in a round shape, but if desired, it can be made in a rectangular shape, or in the shape of a heart, or in the shape of a star.
They allow you to create a beautiful holiday dessert from the beginning of kneading the dough, baking and until applying decor to the top layer of the cake and its sides. You will learn all other aspects of preparing dessert from the article.
Red Velvet Cake - a simple and delicious recipe
See the incredibly tender and delicious recipe for American cake with buttercream.

Ingredients for the dough:
- flour -340 g
- sugar - 300 g + vanillin
- eggs - 3 pcs.
- vegetable oil - 250 g
- kefir or buttermilk - 300 ml
- baking powder - 2 teaspoons
- soda - 1 teaspoon
- salt - a pinch
- red gel dye - 2-3 teaspoons (AmeriColor 123)
Preparing the dough
- In a bowl you need to mix all the dry ingredients: flour, salt, vanillin, baking powder, cocoa and mix.

2. Put soda in a cup with kefir, stir and leave for 2 minutes. Then pour vegetable oil into kefir and mix.

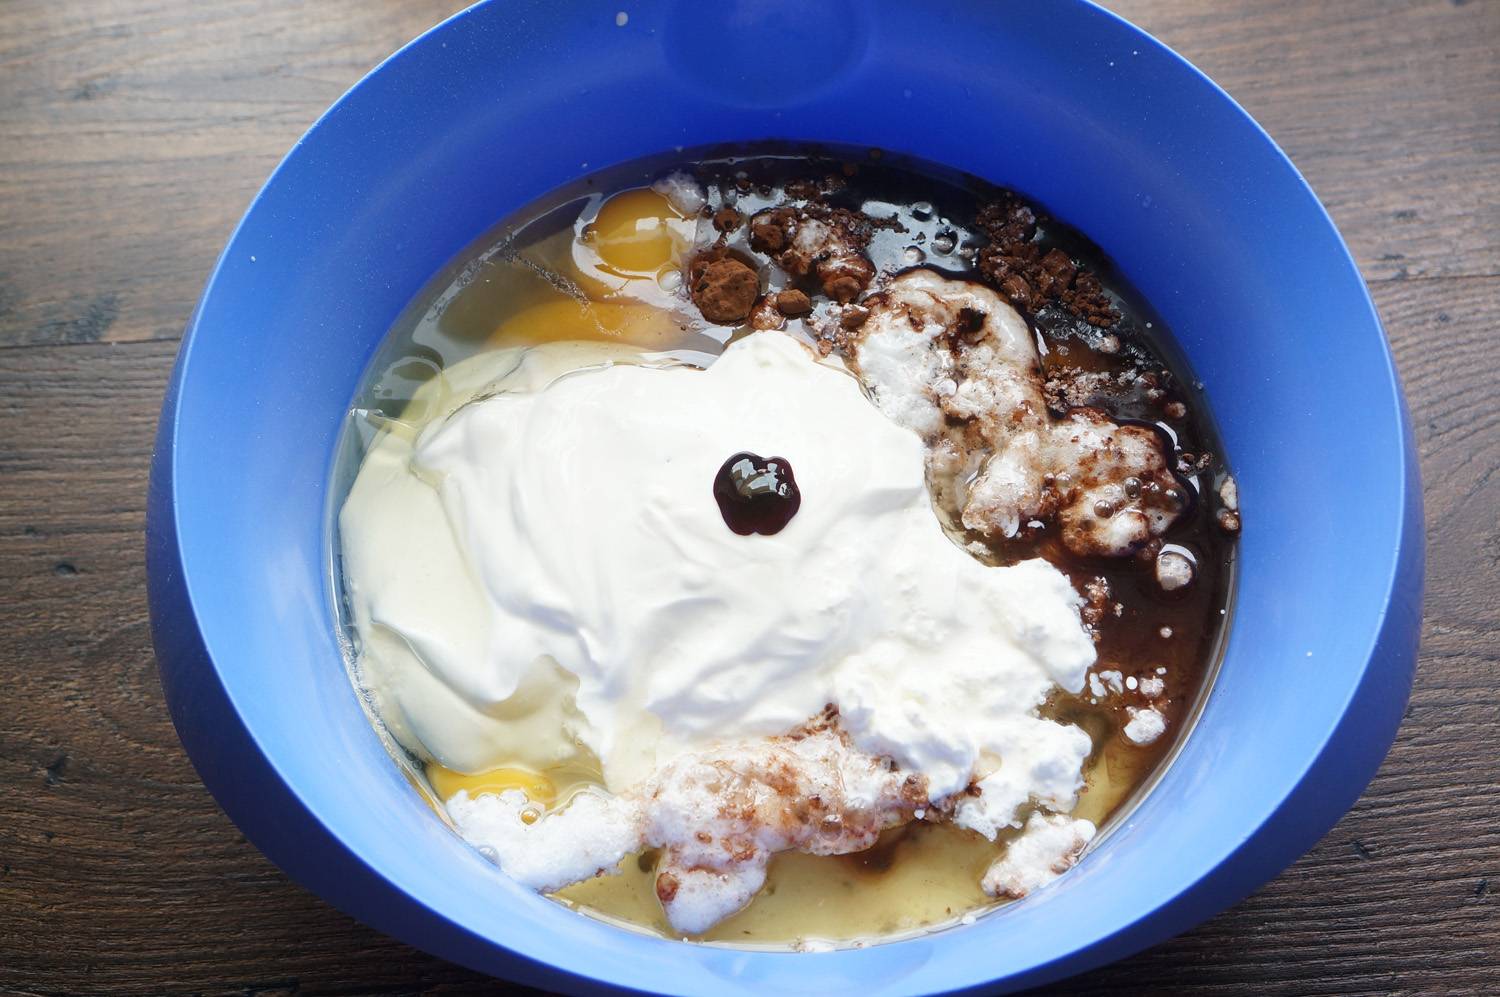
3. After this, pour the gel dye into the kefir and mix again. We need a bright red color.

4. Beat eggs with sugar with a mixer until fluffy white mass. This is approximately 7 - 10 minutes.


dry ingredients.

6. Mix everything well with a mixer and our dough is ready. Divide the dough into 3 equal parts - we will have 3 red cakes.

7. Take a baking dish with a diameter of 22 cm and line it with baking paper, as in the photo.

8. Place 1 part of the dough in the mold, level it and bake each cake for 30 minutes at a temperature of 170 degrees C in the oven.

9. Remove the cake from the oven and let it cool.

10. Remove the paper, wrap it in cling film and put it in the refrigerator for several hours. Check readiness with a wooden skewer.

As a tip: Bake the red cakes in advance, the day before you assemble the cake. The cakes ripen and become very tender and soft.

11. These are the beautiful cakes you should get.

Ingredients for cream:
- cheese cream – 450 g
- butter -200 g
- powdered sugar - 160 g
- vanilla sugar
As a tip: The butter should be at room temperature, and the cheese cream should be cold.
Preparing the cream for the cakes
- For the cream, take butter at room temperature and beat with a mixer for 2 minutes. Then gradually add vanilla sugar, powdered sugar and beat for a few minutes until fluffy.


3. Cream “cheese” can be prepared at home. To do this you need to take:
- kefir 3% - 0.5 liters
- sour cream 21% - 0.5 liters
- Ryazhenka 4% - 0.5 liters
- lemon juice - 2 tbsp. spoons
Preparation of cheese cream: Combine all ingredients in a bowl, add lemon juice, stir. Line a colander with a thick linen cloth and place the mixture. Tie the fabric and hang in a cool place for 24 hours. You will get a light pasty cream weighing 450 g. Ready for use.

4. You have a homogeneous, fluffy cream for the cakes. Do not beat for too long so that the butter does not separate.

Assembling the Red Velvet Cake
- Lightly cut off the top of the cake; it will be used for decoration.

2. Knead the cut tops of all the cakes between your fingers until crumbs form.

3. Grease the dish with cream for the cakes.

4. Spread cream on each cake.

5. Coat the top and sides of the cake with cream, leveling with a long spatula.

6. Sprinkle the top and sides with red crumbs, pressing the crumbs onto the cream with a spatula for adhesion.

7. For decoration, make a cream from the following ingredients:
- butter - 100 g
- powdered sugar - 100 g
- food coloring gel
Preparation of cream for decoration: Beat soft butter with a mixer. Add powdered sugar and beat at high speed until fluffy cream is obtained. To get a soft pink cream, add red gel coloring to the tip of a match and stir. Or leave the cream white.
8. Place the finished pale pink cream in a cooking bag and, by squeezing, create flowers on top. Then we let our masterpiece soak for at least 4 - 8 hours.

9. Cut a piece from the finished dessert and see the extraordinary beauty of the product.

Enjoy your tea with Red Velvet dessert. Bon appetit!
Red Velvet - classic recipe with video
You looked at the classic American-style dessert. Have you thought about it? Let's go further and analyze other recipes.
Recipe for Red Velvet Cake with Curd Cream
Learn how to make a heart-shaped cake. The dessert turns out to be both beautiful and very tasty, consisting of two cake layers.

Ingredients:
- 1 glass - kefir
- 2 cups of flour
- 2 tbsp. spoons - cocoa powder
- 1 cup sugar + vanillin
- 100 g - butter
- 3 eggs
- 1 teaspoon - baking soda
- 1 teaspoon - vinegar
- red dye

Prepare the red dough to make the Red Velvet cake beautiful
- Beat the well-softened butter with a mixer for 3 - 4 minutes. Continuing to beat, gradually add sugar.

2. Now add all the eggs one at a time and continue beating the mixture.

3. Pour half a glass of kefir into a bowl, and add 1 tbsp to the rest. spoon of dye. Mix the dye in a glass with a spoon.

4. Add the mixed dye with kefir from the glass to the bowl and mix everything. The mass has a rich red color.

5. Pour cocoa powder into the bowl and mix again with a mixer. Pour in vanilla.
6. Pour vinegar into baking soda to extinguish.

7. Carefully mix the soda and vinegar with a spoon.
Let's put it aside for now and pick it up later.

8. Sift the flour in parts into a bowl and mix.

9. Mix the flour carefully with a mixer in parts. Add dissolved baking soda and mix again.

10. Divide the dough into two parts. Place one part in a baking dish in the shape of a “heart” and place in the oven preheated to 200 degrees C for 25 minutes. Then bake the second cake.
When filling the silicone mold with dough, you do not need to lubricate it with anything.

Assembling and decorating the cake
- Remove the crust from the oven. We see that it is well baked.

2. Turn the silicone mold over and the cake separates well from it.

3. Cut off the top of the cake to create crumbs.

4. This is the porous and tender cake we see after cutting off the top.

5. We break the cut part and put it in a blender to grind and obtain velvety crumbs.

We will need:
- cottage cheese of any fat content and in any quantity (here 250 g)
- butter - 2 times less cottage cheese
- vanillin and powdered sugar - to taste (2-4 tablespoons)
6. We prepared the curd cream after watching the video. Spread the curd cream on the top of the first cake layer.

7. Cover the spread first cake layer with the second cake layer.

8. Coat the sides and top of the cake well with a spatula. Then we begin to sprinkle with red crumbs, lightly pressing them onto the cream.

9. Decorate the top of the dessert with velvety crumbs.

10. Additionally, apply small flowers for decoration.

Here we have such a beautiful Red Velvet.
Red Velvet cake with sponge velor - a cake recipe with a new taste
In this recipe you will learn the effect of biscuit velor.

Ingredients:

Preparing the dough
- If you don’t have a planetary mixer like the one in the photo, use your regular one. Place softened butter in a bowl and beat until fluffy.

2. As soon as the butter has lightened, add granulated sugar.

3. Start beating the butter and sugar until smooth.

4. Then drop in the eggs one at a time and beat one at a time.

5. Now add half a portion of kefir and mix again.

6. Let's start with the dry ingredients. Add cocoa powder and baking powder to the sifted flour. Mix everything well with a whisk.

7. Add half of the mixed dry ingredients to the egg and oil mixture in a blender bowl. Mix everything.

8. Now add the remaining kefir to the bowl and mix everything again.

9. Add the remaining portion of dry ingredients. Mix everything again.

10. We take out the dye and add it to our dough. Mix. The bright red effect has been achieved. The dough is ready.

Baking cakes
- We take out a baking sheet. Spread the foil on it, folding it in half. Place a one-piece baking ring with a diameter of 16 cm on the foil. We wrap the ring with the edges of the foil up, as in the photo.
- First, divide the dough into 3 layers, preferably using a scale. We place one part of the dough in our ring. Place in the oven, heated to 150 degrees C for 30 - 40 minutes. Check readiness with a wooden stick.

3. We take the cakes in rings out of the oven - they are still hot.

4. Carefully unfold the foil and take the rings up. These turned out to be such beautiful cakes. Red Velvet cake should be red and beautiful.

5. Wrap the warm cakes in cling film.

By wrapping the cakes in film, we create conditions in which the moisture is evenly distributed throughout the cake and does not go anywhere. Leave it like this until it cools to room temperature. Then they need to be put in the refrigerator for 3 hours.

Preparing cream cheese cream
- Beat butter, room temperature (130 g) with sifted powdered sugar (160 g). Beat the mixture with a mixer until smooth.

2. When the butter has lightened, add curd and cream cheese (560 g) and stir everything with a mixer until smooth. Remember - the cream cheese must be very cold.

3. We put the pastry bag on the glass and put the prepared cream into it.

Assembling the Red Velvet Cake
- We have 3 cakes. We cut each cake into 2 parts. The integrity of the cake will consist of 5 layers, the sixth part will be used for crumbs. In addition, we cut off the top part of all the cakes and also send them into crumbs.

2. Knead the crumbs in your hands and fill a baking sheet, which we place in the oven preheated to 100 degrees C for 40 minutes. The crumb should dry out. Grind the dry crumbs in a blender.

3. Assemble the cakes on a rotating table. We coat each cake with cream, as in the photo.

4. Squeeze the cream out of the bag onto the side walls.

5. Level the cream on the sides and top with a spatula.

6. Using a silicone brush, apply red crumbs to all surfaces of our cake.

7. Decorate the upper part with flowers.

As you have already noticed, the velvet crumbs are of a different size and correspond to the concept of “velor”. The red velor effect cake dessert is ready.
How to decorate a Red Velvet cake with New Year's motifs - video
I assume that while viewing all the recipes, you fell in love with Red Velvet and it made a positive impression on you.
- Flour - 340 g
- Sugar - 300 g
- Cocoa - 5 g
- Salt - 1/4 tsp.
- Baking powder - 5 g
- Soda - 3 g
- Eggs - 3 pcs
- Vegetable oil - 300 g
- Buttermilk/kefir – 280 g
- Gel dye - 2 tsp.
Just don't say you haven't heard of Red Velvet (more correctly called Red Velvet).
Note to the owner - there are many theories regarding its origin. Some believe that its recipe originated in the Southern part of the United States, while others believe that the cake recipe originated in the Northern part. But what is certain is that this cake has become a favorite dessert of Americans and Canadians in recent decades.
The bright red color of the cake contributed to the fact that Red Velvet Cake became known as Devil's Food. John Mariani, in his book A Dictionary of American Food and Beverage, suggests that the cake came to be called Devil's Food due to its amazing taste, which some moralists may consider sinful.
Now I’ll explain why this is an ultra popular dessert. Look at the appearance: bright red cakes and snow-white cream. The classic cake is completely covered in cream on the outside, but I wanted to evoke more expression and passion, so I made it “naked.” It is incredibly bright and catchy, and besides, I don’t know of any other cake that’s even slightly similar.
It has very porous and moist cakes, they literally melt in your mouth, but that’s not the point. The whole trick is in a small amount of cocoa, which is added to the dough, but is masked by the red color. That is, when you bite off a piece, you expect anything but a chocolate aftertaste. This is a cake that deceives perception and surprises again and again. I’m not exaggerating, with every bite I was again surprised, “Oh, it’s chocolate,” because it doesn’t look like that from the outside.
Add buttercream, which most of my subscribers are in love with, and you will get a cake that you will want to make again, again, again...
Andrey Rudkov
If you need any ingredient, confectionery equipment and equipment, come to my store - dvemorkovki.ru. I plan that it will become the most convenient store for those who love to cook. An up-to-date showcase, many payment and delivery methods (all over the world), I have my own store in Moscow and products that I select myself and ingredients that I use on the blog. Come in!
Ideal things are, perhaps, ideal in everything. The dough is so simple that there are even no criteria for what ingredients to add when. I didn't turn on the mixer at all until I added the final ingredient. Isn't that great?
In a bowl, mix flour (340 gr.), sugar (300 gr.), alalized cocoa(5 g), 1/4 tsp. salt, soda (3 g), baking powder (5 g).
At the end you need to add buttermilk (280 g). I replaced it with low-fat cream 10% (150 g) and sour cream 20% (130 g), you can just take thicker kefir. And red food coloring. The highest quality and most effective result is AmeriColor Red Red (or Super Red).

The dough will be quite liquid, don't be alarmed, that's how it should be. Leave it for 10-20 minutes, the thing is that the soda needs some time to react with the milk ingredient.
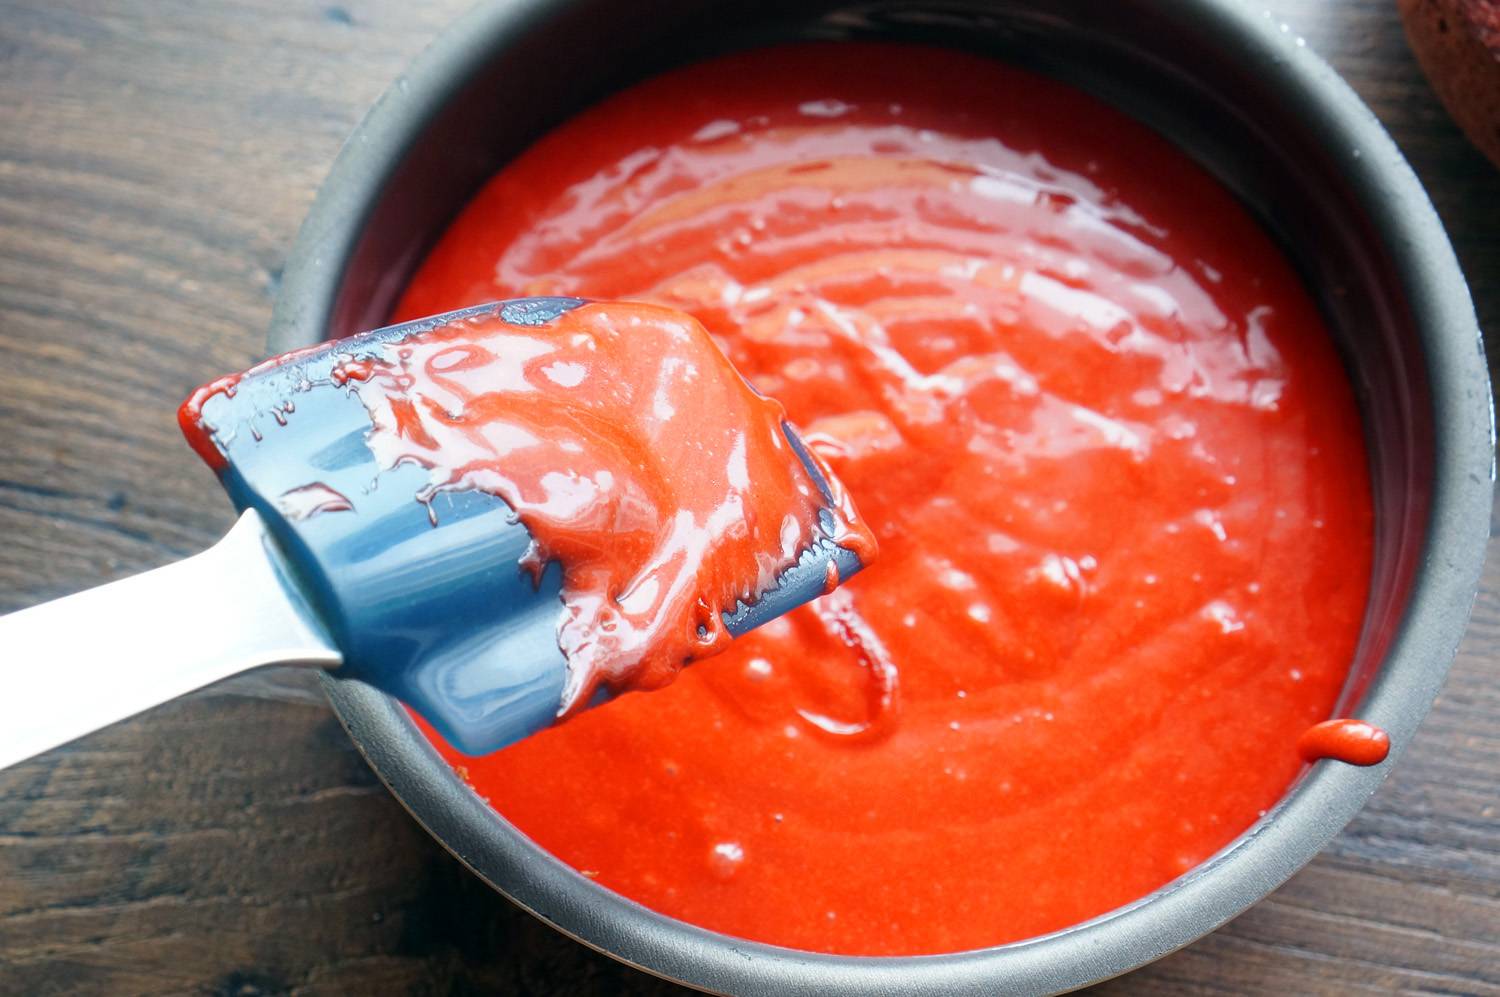
Grease the pan with butter and place parchment on the bottom. And pour out the required amount of dough. I made three cakes of 16 cm each. Or it will be two of 18 cm each. To be completely professional, first weigh the empty bowl, and then the bowl with the finished dough. Through mathematical calculations you will understand how much dough to pour into the mold for each cake.
Bake at 170 degrees for 20 minutes. Watch carefully. At the 15th minute I started checking with a skewer. As soon as it began to come out dry, I took out the mold. Let the cake cool in the pan on a wire rack for 2 minutes, and then carefully remove the cake onto a wire rack.
Cool the pan (I just rinse it with cold water), grease it again with oil, put the parchment on the bottom and go ahead. When the cakes have cooled, wrap each with film and put in the refrigerator for 2 hours.
After two hours, take out the cakes and carefully cut off the top - most likely it will rise a little in the center.
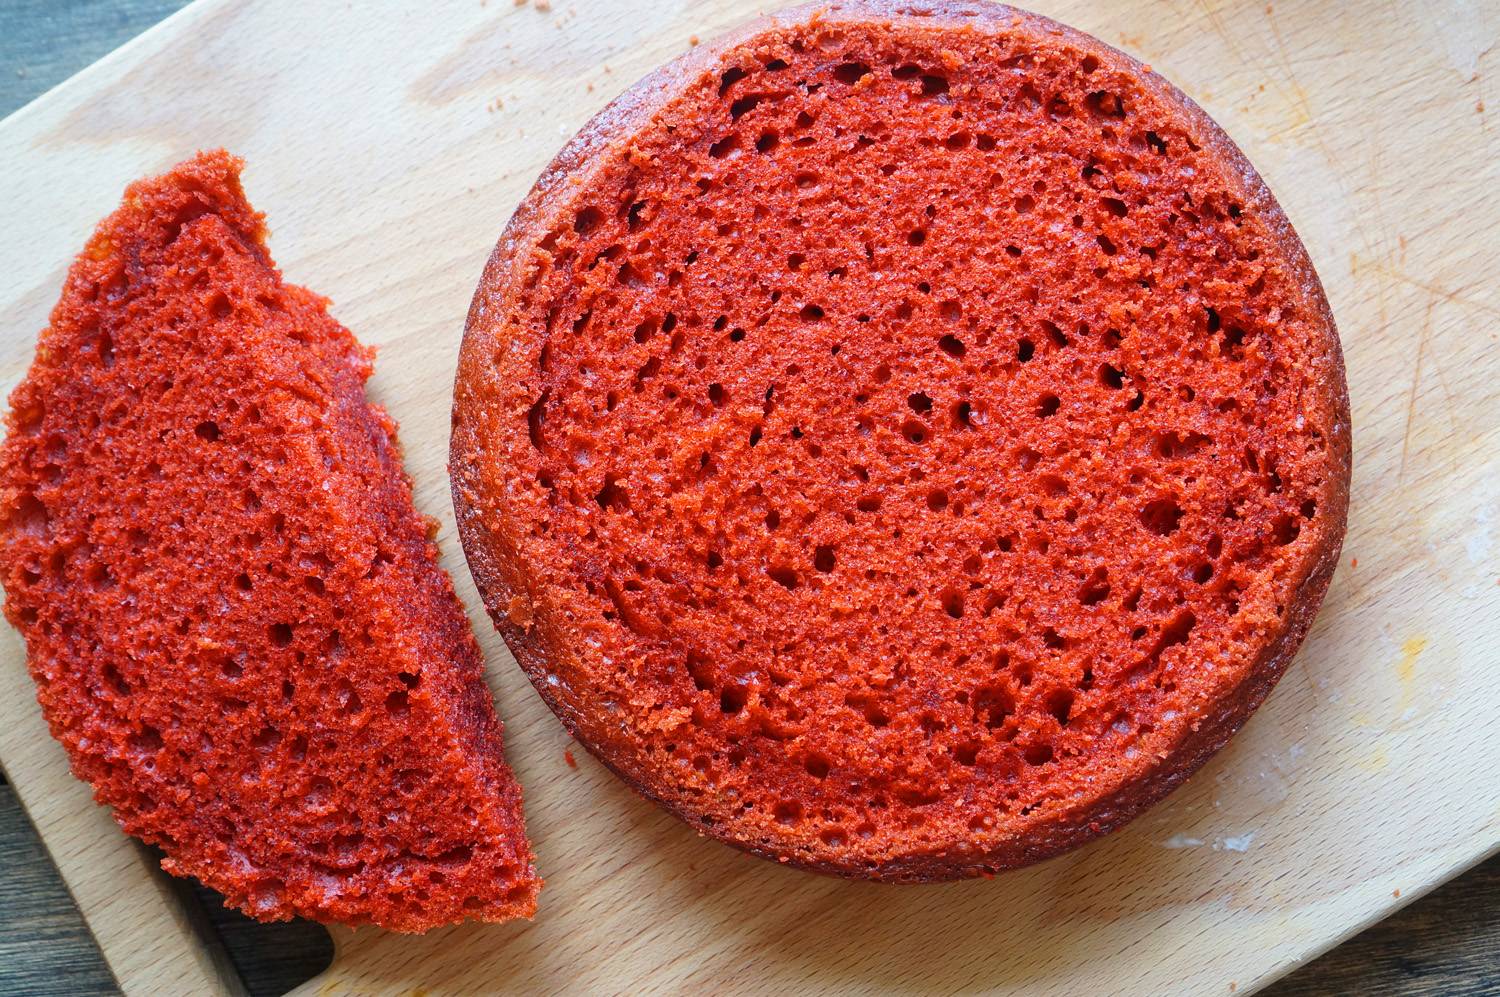
Look how porous the cake is. And how delicious it is. Then you can coat the cake layers with cream and assemble the cake. I'll show you how I did it.
To make a naked cake beautiful, you need to trim the ends (they brown in the oven and become more brown than red). You can simply cut a thin layer with a knife, but I cut with a metal ring - the only way to get all the cakes the same shape and size.